|
PAINTING PORTRAITS ORIGINALLY
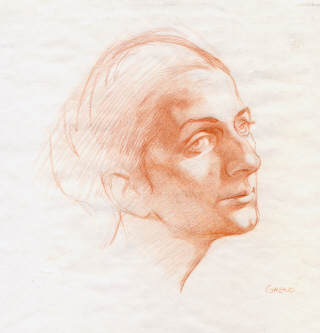
PUBLISHED IN AMERICAN ARTIST , t t t t FIGURE 1: "WATCHER" |
|
||||||||
|
__________________________________________________________________________________ |
|||||||||
|
Getting a Likeness Before I began painting seriously, I spent many years as a political cartoonist. During that time, I was forced to work within tight deadlines and I therefore had to find reliable strategies to seize a likeness quickly. When I began concentrating on painting and teaching, I discovered that if I removed the distortion associated with caricature, I could apply similar strategies to more serious portraiture. Since then, I’ve met several superstitious students who seem to think that achieving a good likeness in a portrait painting comes from luck. In truth, luck has little to do with it: Successful portraiture comes from establishing a sensible plan of action, which I refer to as "creating a blueprint."Creating the Blueprint There’s a great deal for artists to consider when they make a portrait drawing. Some, especially beginners, become so overwhelmed that they’re not only afraid to make mistakes, but they’re too intimidated to even lay the pencil on the paper. I tell my students something the American painter Thomas Eakins once said: "You don’t try to get anything right at first. You guess at it, then correct it."
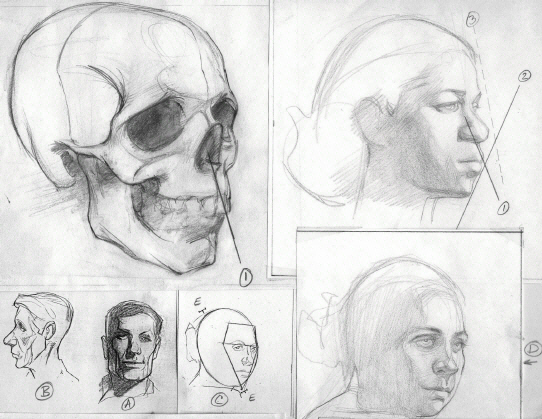
When I start a portrait, I look first at the big shape of the head, asking myself, Is it square (A in above illustration), triangular (B), or round (C)? Does the width of the shape change at the top, bottom, or middle?" I know from experience—and from many mistakes—that the shape of the head is never absolutely symmetrical. Once I’ve established this external shape, I look at the inner shapes and planes: The external shape of the head might appear round and bulky while the inner frontal plane of the face might look triangular and the forehead might appear square (see C in the above illustration). Find what I call the "facial angle"— the plane running from the base of the nose to the top of the maxilla (upper jaw). Compare this angle to the slope of the lower dental arch and chin and then to the angle running on top of the forehead and nose. There’s no way to get a likeness without establishing the sitter’s silhouette. However, you can still lose the likeness if you don’t correctly locate the relative placement of the features on that shape. I use standardized facial proportions as a jumping-off point for placing the features on the face. Traditionally, the face can be divided into three equal parts: from the hairline to the eyebrows, from the eyebrows to the base of the nose, and from the base of the nose to the chin. In addition, when you’re looking at the head from the side, the ear is usually located slightly behind the midpoint of the width of the head. Looking at the head from the front, the distance between the eyes is usually the width of one eye, and often this distance equals the breadth of the base of the nose. The outside contour of the nose tends to line up with the inside of the eye, and the outside corners of the mouth frequently lie directly below the center of each eye.
|
|||||||||
|
|
 |
||||||||
|
t |
|||||||||
|
Figure two and three above. Notice the major divisions of the facial area in the image on the right. |
|||||||||
|
t |
|||||||||
|
|
|
||||||||
|
t |
|||||||||
|
Figures 4 and 5: Often, the distance from the ear to the eye is the same as the distance from the eye to the mouth (E). The ear (D) is always at an angle, never straight up and down. Notice the plane change, from top of skull to front of forehead. Compare the front and side planes of the skull to those of the drawing on the right. |
|||||||||
|
t To give your portraits more solidity of form, try visualizing the head in its simplest shape—as an egg. Upon this rounded form, the features both move toward and recede from you. Remember: Specific features such as the eyes, nostrils, and lips always stay subservient to the big, underlying planes and values.
|
|||||||||
|
|
|||||||||
|
t Once the blueprint of the head has been established, I focus on the specific, individual features. Like the basic shape of the head, individual features can appear fuller toward the top, the center, or the middle. For example, the nostrils might rise outward and high, while the ball of the nose might weigh heavily toward the bottom of the face; another nose might do the reverse. The variations are many; all are based on relative height, bulk, and sharpness.I’ve found that the best system for teaching portrait painting is to refer to the notebooks of Leonardo da Vinci. Born in 1452 in the Tuscan town of Vinci, Leonardo was trained in Florence by Andrea del Verrocchio. By the age of thirty; he had gone to work for the Duke of Milan as a military engineer and only secondarily as an architect, a sculptor, and a painter. In his later years, until his death in 1519, he devoted himself to scientific interests. Leonardo believed the artist must know not only the rules of perspective but all the laws of nature, and to him the eye was the perfect instrument for gaining such knowledge. His passion to understand the structure of the human body led him to dissect corpses and make the first anatomical drawings. His interest culminated in, among other things, several thousand pages of illustrated notes and drawings on artistic theory, human anatomy, natural history, the flights of birds, the properties of water, biology, and numerous mechanical contrivances. In his notebooks, Leonardo wrote that human features can be categorized into a few major types: those that lie flat along a baseline, those that rise, and those that fall from the baseline. He urged his students to catalog and memorize these feature variations so they could easily and confidently reconstruct a likeness from life or memory. "Carry with you a little book in which you have noted such features," he wrote. "When you have cast a glance at the face of the person you wish to draw, you can look at it in private, which nose or mouth is most similar, or make a little mark to recognize it again at home." Remember, though, that a good likeness doesn’t stop with a simple two-dimensional mapping out of the features—each face has a special, particular feeling of breadth, girth, and sculptural density. A Sense of Focus You can also use a sense of focus to make the features come forward or recede. Gilbert Stuart, who painted several well-known portraits of George Washington, often rendered the nose, eyes, and mouth more sharply than the rest of the face, which made it seem as if the features were projecting into space. To create a more illusionist, three-dimensional effect, Stuart blurred some of the outer or rear edges of the head. The Importance of Anatomy Of course, if you get carried away with the softness of the face, your portrait will appear overly rounded and mushy, like a boneless doll of soft cloth. Although it’s not absolutely necessary, I encourage my students to sketch the human skull and research the muscular form as much as possible. The skeletal underpinnings give the face structure and solidity, and the muscles impart a sense of softness. After studying a bit of anatomy, you may find yourself making quicker decisions in your portrait work. You’ll probably begin to notice how clearly the lights and shadows mimic the underlying bone and muscle structure. Where the bones and muscles bend decisively, the values change markedly. Where the muscle planes are softer; the values make a smoother transition. Also, highlights tend to occur at the plane breaks and on bony ridges.
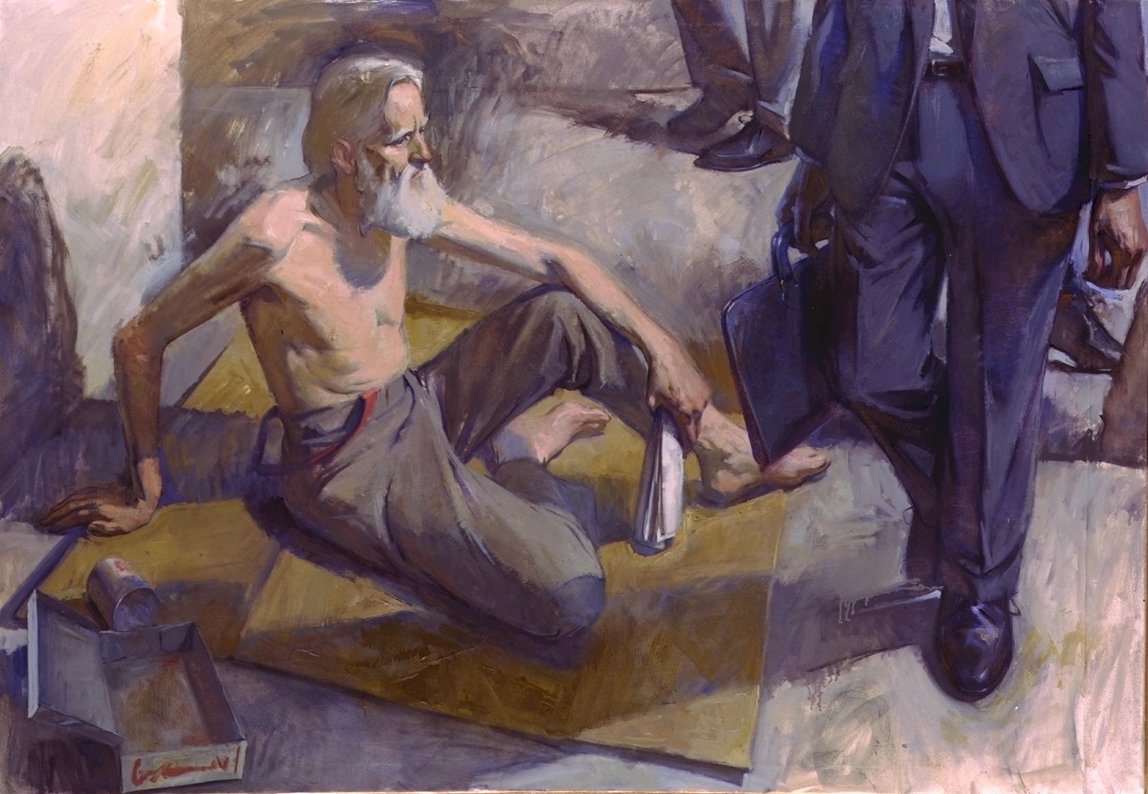
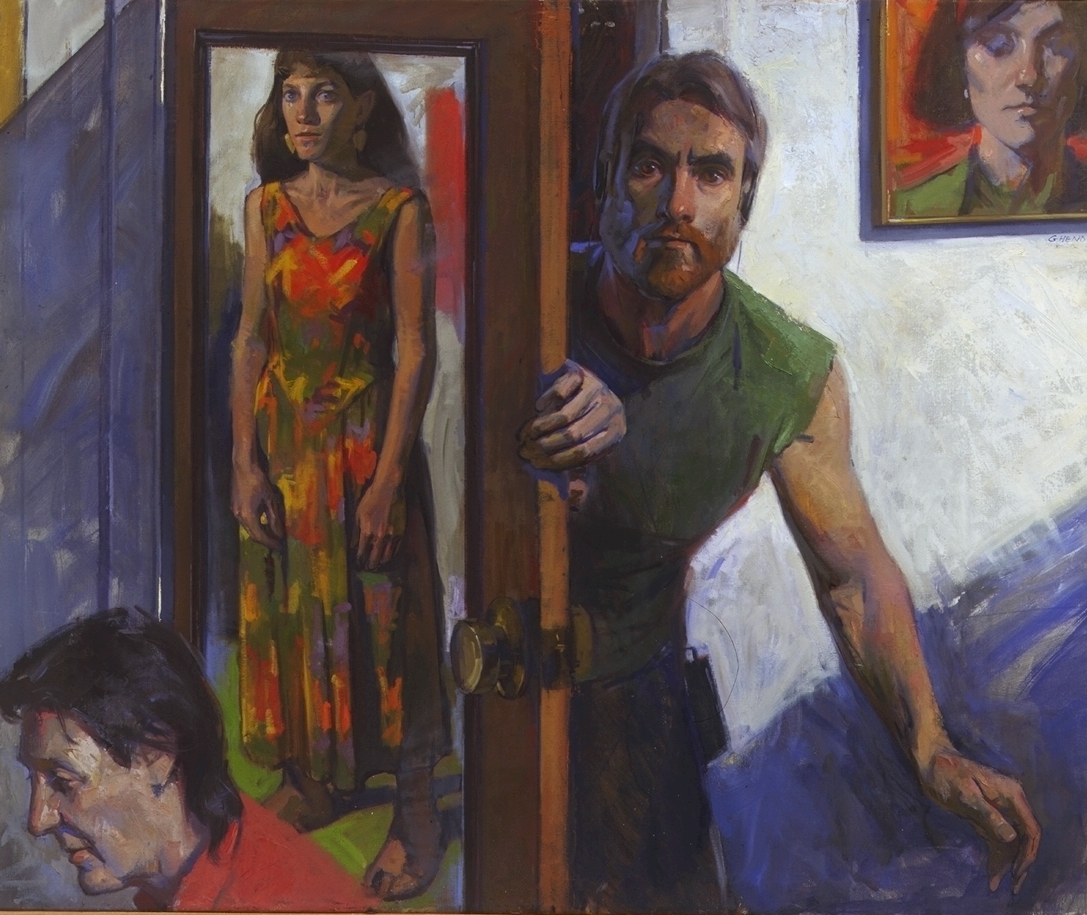
Animating the Portrait Almost every portraitist has heard the criticism, "I don’t know what it is, but the painting doesn’t quite look like...." This can happen even if the features are correctly proportioned —you’ve probably painted the face unnaturally at rest. Most people are seen in conversation, so their faces are animated, with their features slightly puffed out and, especially in the eyes, rising toward the outside. To remedy this situation, try to keep your sitter engaged and lively at all costs. You might not want to discuss intense political issues while brushing on a delicate passage, but try not to let too much time pass without posing a question or comment. Let your model do most of the talking. You don’t necessarily have to listen closely—just concentrate on the flexed facial muscles. Also, you must learn to observe people. It’s said that Leonardo used to follow his models around for days in order to gain greater insight into their inner feelings. "It seems to me,’ he wrote, "that those sciences are vain and full of error which are not born of experience." Spend some time watching your sitter in movement before you totally commit yourself to the drawing. Does he or she arch one eyebrow higher than the other? Perhaps your model’s smile tends to spread more generously toward one side. These subtle imbalances can add gesture and personality to a portrait. No Flat Backdrops In conventional portraiture, we tend to put the emphasis on the single figure. Still, you want to be careful not to focus so much on the model that you create a cutout figure isolated from his or her environment. In my large paintings, I often use my models as actors locked in a bigger drama. The surrounding space is as important to my storytelling as a stage is to a playwright. Even if you’re painting only one sitter, you don’t have to use a background or flat backdrop for your surroundings. Simple props such as an open book or a loaded ashtray can effectively define the sitter. It’s important to try to paint the air or atmosphere around the figure in such a way that all the elements of the setting seem integrated and allied to the total effect of the likeness. Here and there, let your sitter melt into the background, especially where one dark value meets another. Also, look for the halo effect that occurs when light appears behind dark, shadowy edges; this back light melts quietly into the dark rim, slightly altering its color and value. Sometimes I accentuate the color surrounding the figure to better fuse the sitter with the composition. Since human eyesight is binocular, the brain receives two slightly different images. Our eyes are spread apart horizontally, so the vertical edges of whatever form we look at tend to be slightly blurred. This phenomenon can be turned to your advantage, though, when you’re trying to determine which edges to fuse into the environment. For instance, try painting the top of the hair in focus (but not too sharp!) and then render the side of the hair more softly. Keep Trying No system or approach to drawing a portrait is absolutely
foolproof since no one can maintain vigilance and concentration one hundred
percent of the time. But don’t become immobilized by your frustration. Look at
John Singer Sargent: After one sitting, he would frequently wipe out a head if
the portrait didn’t meet his standards. The next day, with the objectivity of
a night’s rest, he would completely repaint the face—and do so until he was
satisfied. Sargent’s contemporary, Abbott Thayer, would labor over the same
portrait for years, building layer upon layer of impasto and velvety veils of
glazes. He once began a painting while the sitter was in her late teens and
finished it after she had reached her late twenties. And Leonardo da Vinci, of
course, spent more than four years on the Mona Lisa. Thomas Eakins spent years
developing a single portrait. The only system that seems to work is one that
includes patience, perseverance, and study—and a sense of humor to get you
through the roughest moments. |
|||||||||
|
|||||||||


